This post was sponsored by the Role Mommy Writer’s Network.
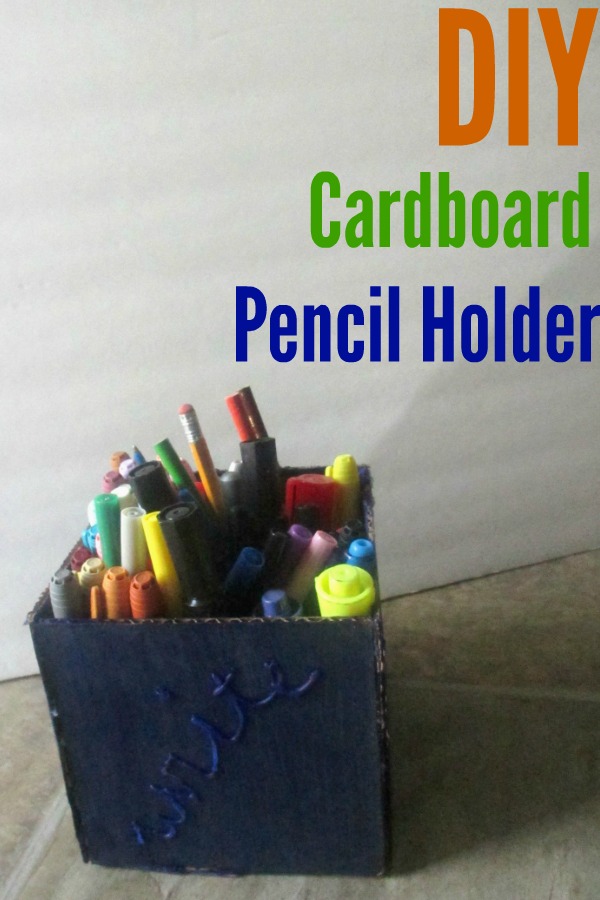
My garbage company also offers “all in one” recycling. We get a bin that looks just like our trash bin, except we can put anything recyclable in it including glass, wood, cardboard, paper, most plastics, and so on. It’s a very simple way to recycle and looking in my bin each month reminds me how much my household really goes through. Most months our recycling bin is primarily cardboard boxes from online shopping. While I feel good about recycling, I often find myself wondering if I could reuse the cardboard myself. I’ve started to get a little crafty with some of the remaining cardboard. I thought I would share a simple DIY cardboard pencil holder which is perfect for back to school season.
Materials:
- Cardboard
- Paint (I used acrylic)
- Paintbrush
- Westcott Hot Glue Pen
- Glue sticks
- Utility knife or carpet cutter
- Pen or pencil
First you’ll want to decide on the size of your pencil holder. I had a ton of markers taking up much of a “junk drawer” so I made mine rather large at 5″ per side. This means I cut out five pieces of cardboard that were 5″ square.
If you are planning to use yours as a pen and pencil holder for your desk or office 2.5″ wide, 2.5″ deep by 5″ high would be ideal. To make that size you’d need a 2.5×2.5 inch square for the base, and then four 2.5″ by 5″ sides.
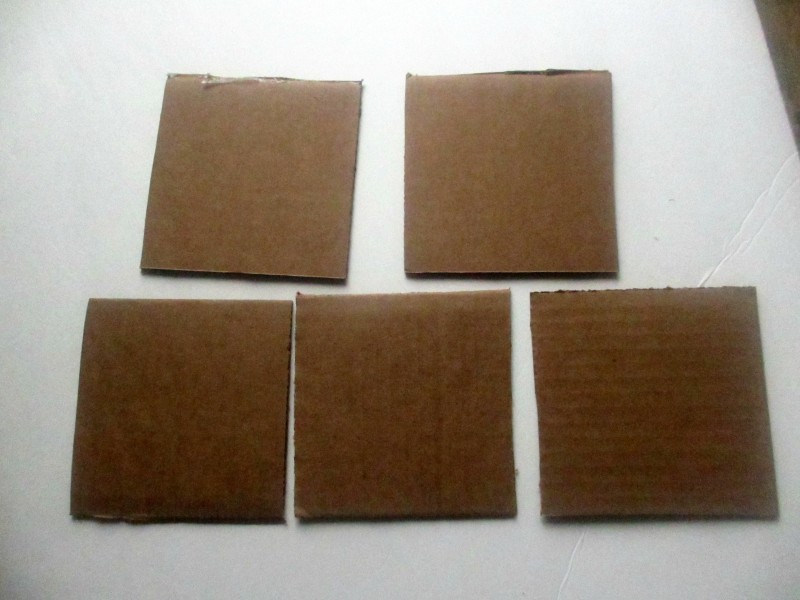
Step 1: Cut out your five pieces of cardboard.
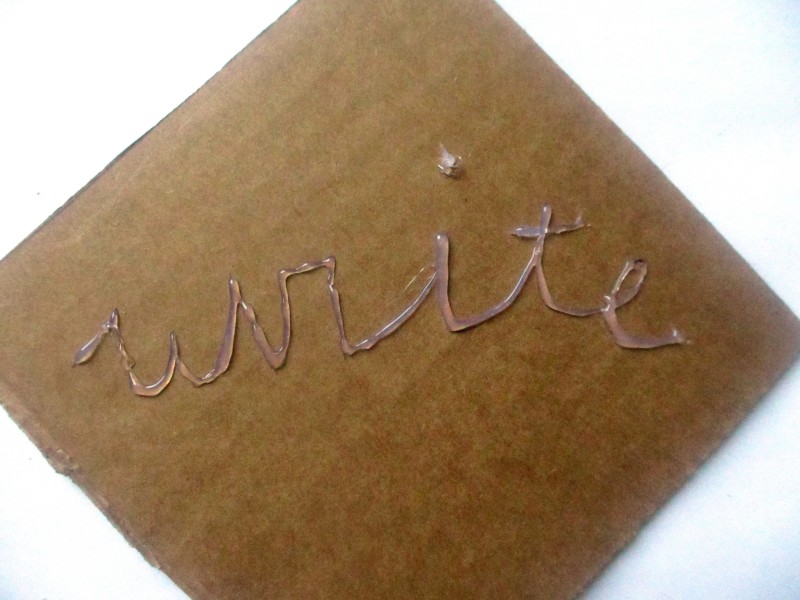
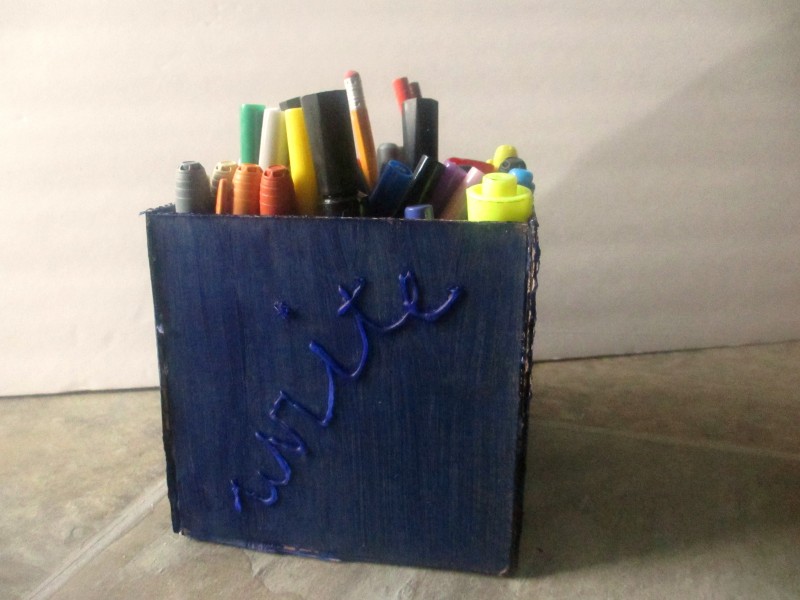
Step 2: Decorate the cardboard. I chose to write the word “write” on the front panel piece using the Westcott Hot Glue Pen. This pen is thin and easy to hold and control while writing. Instead of pushing on the end of the glue stick to feed it in, there is lever you can push forward, and then when you push the trigger it pushes the glue out at a more even pacing than a regular glue gun would. This makes it more smooth and less likely to give you globs. Using the pen did take some practice so I recommend trying it on a scrap piece of paper or cardboard until you get the hang of it. If you don’t want to write a word, you could do a texture or pattern instead, like zig-zags, polka-dots or a random splatter design.
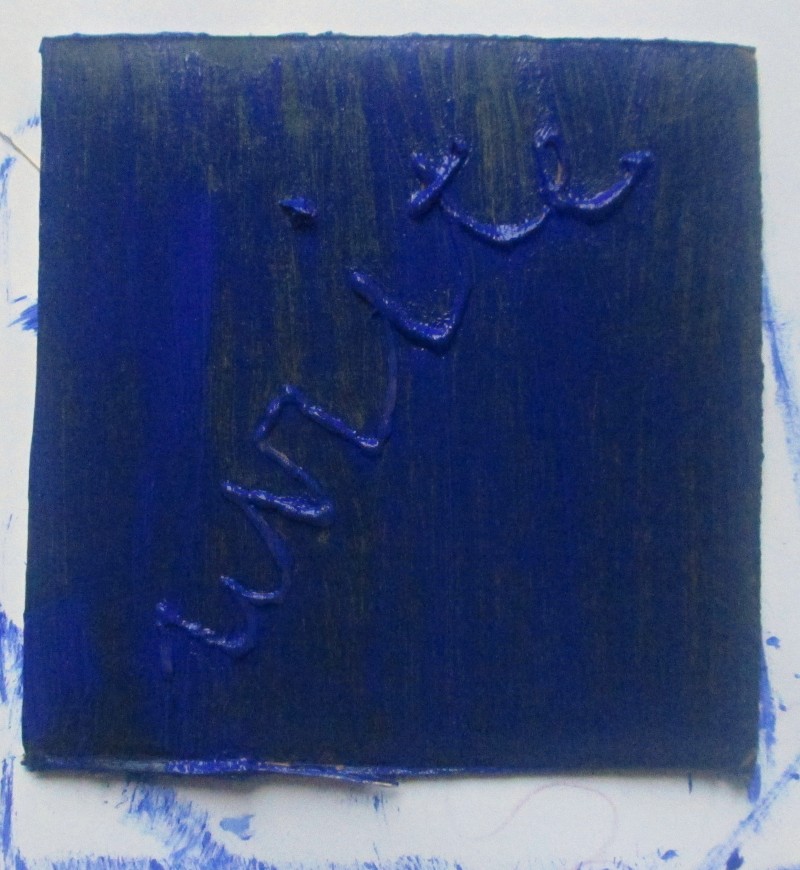
Step 3: Paint! I painted all sides of all pieces of cardboard, so I did the front sides and let them dry before doing the second side. Paint right over the hot glue areas. Allow it to dry well.
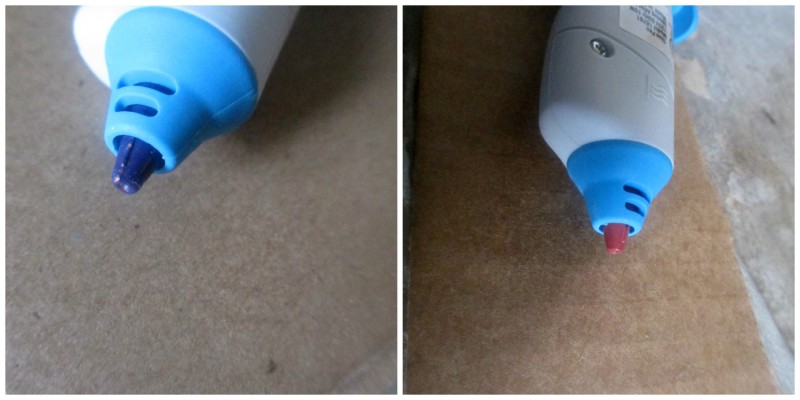
The Westcott Glue Pen tip turns from blue to red when it is hot so you know when it is ready.
Step 4: Heat your glue-gun back up and hot-glut the cardboard into shape. I chose to put hot glue on the raw edge of a piece and then line it up against the side of the side of another piece, to hide the hot-glue marks as much as possible. If any of your sides do not line up perfectly, glue it as well as you can and then let dry. Then from the *inside* of the pencil holder, add more hot glue in the gaping area. This will keep the access glue from being visible on the outside.

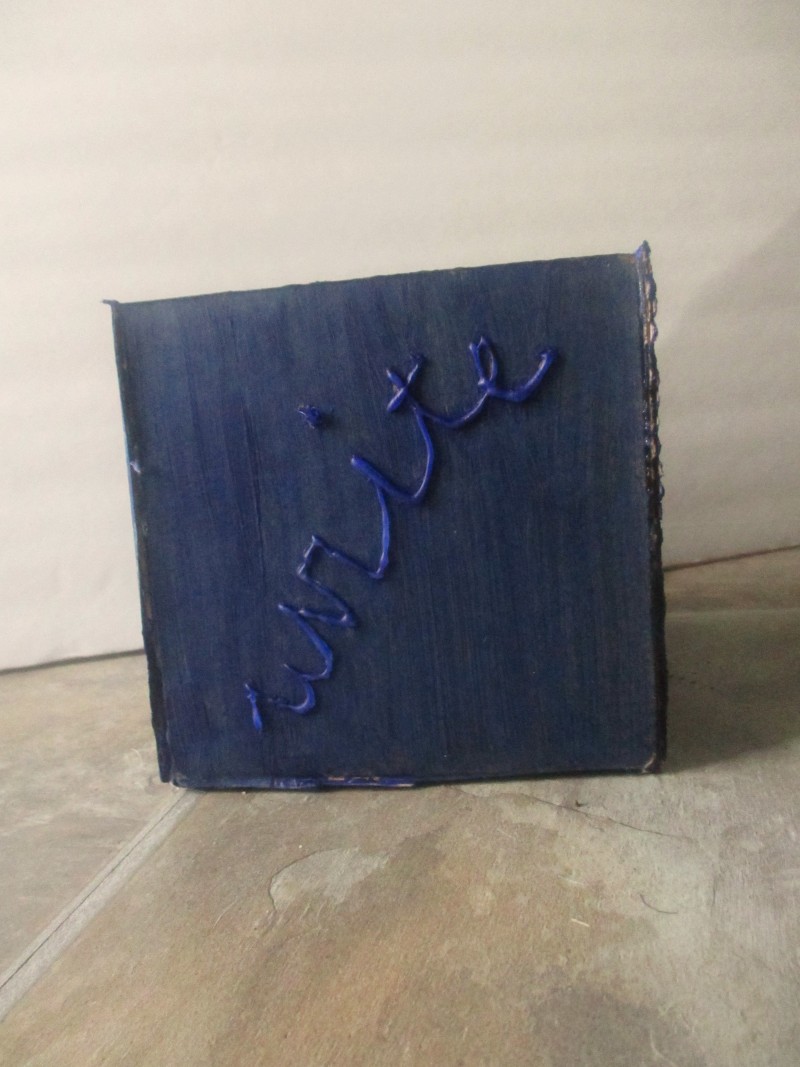
Step 5: Once hot-glue is dry, fill it up with writing utensils!
These could be made and customized with teachers’ names and given as gifts. Perhaps even fill with new pencils as an added bonus for the teacher. It would also be ideal to keep in a locker for older kids so they don’t lose their pencils between classes.
Visit Westcott Creativators for more craft tutorials and ideas!
Do you have any tips for reusing cardboard boxes or getting organized for back to school? I’d love to see your projects or ideas in the comments below.

Hi there! I am Emily Evert, the owner of Emily Reviews. I am 28 and live in a small town in Michigan with my boyfriend Ryan and our two pugs. I have a large family and I adore my nieces and nephews. I love reading memoirs, and learning about child development and psychology. I love watching The Game of Thrones, Teen Mom, Sister Wives and Veep. I like listening to Jason Isbell, John Prine, and other alt-country or Americana music. I created Emily Reviews as a creative outlet to share my life and the products that I love with others.
This post currently has 9 responses.
-
Lauryn R
This is such a cute pencil holder, thank you so much for sharing the how to! 🙂 I love reusing cardboard and other containers to make things. My dad made my kids and airplane out of an egg carton and they love it!
-
Brandon Sparks
What a great idea. I would have never thought of this. I will show my kids how to do this. Thanks so much..
-
Sarah L
Fun box, but I’m in love with your glue gun. Much better than what I have.
-
ellen beck
I like how you used a glue gun! I remember maing something a whole lot like this and putting on either yarn or string for the writing gosh it was a mess. This would make a nice littele rainy day or winter day project and I am all for recycling and repurposing things.
-
hannah
I have never thought to use a hot glue gun as a way to write words. This is so clever!
-
Dorothy Boucher
What a super fun project this is, I should make a couple of these for markers and crayons for the children.
@tisonlyme143

I have not heard of that brand before. I like that it turns a different color when it is hot. Thank you for the review.