
Laying a new tile floor can be intimidating, but it doesn’t need to be. It is tedious work, but overall it is a fairly easy DIY project. Follow these 8 steps to complete your tile flooring project.
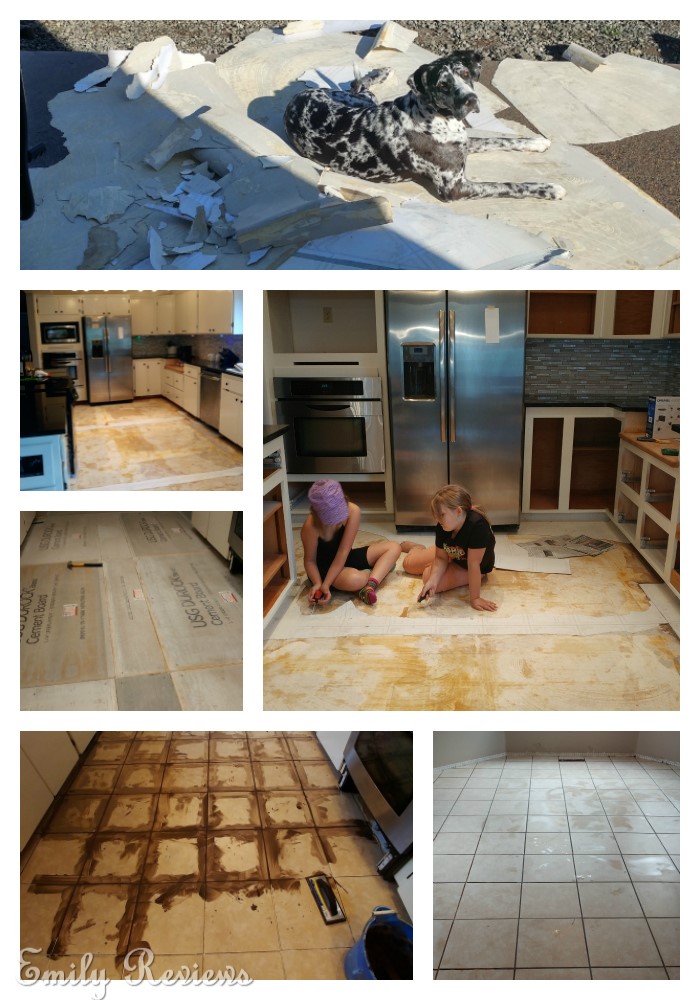
- Prep your workspace. Remove any/all old flooring. Then sweep or vacuum your works space to remove all dust and debris. Take the time to pull any loose staples or nails that may be in your subfloor. You want a completely clean and smooth work surface.
- Lay down your backerboard. Backerboard gives you a flat level surface to set your tiles on and it provides you with a moisture barrier. I like to fit the backerboard pieces in a way that leaves me with little to no cutting required. It is a bit of a puzzle to put together but in the long run, it is worth it. Once you have the pieces arranged on the floor, use backerboard screws to securely attach it to your subfloor.
- Find the middle of each wall and snap a chalk line running from one side to the other. The line crossing at the room’s center is the middle point of your room. This will be your starting point. Layout your floor tiles, in your desired pattern, starting at this center point and work out. This will not only help reduce the number of tiles you need to cut, but it will also help create a nice focal point.
- Mix your thinset mortar exactly as the package instructions say. Starting at the wall furthest from the door, spread a thin layer of thinset over a 2×3 foot area with a notched edge mortar trowel. Then apply more thinset to the back of the tile, using a straight pass for best adhesion.
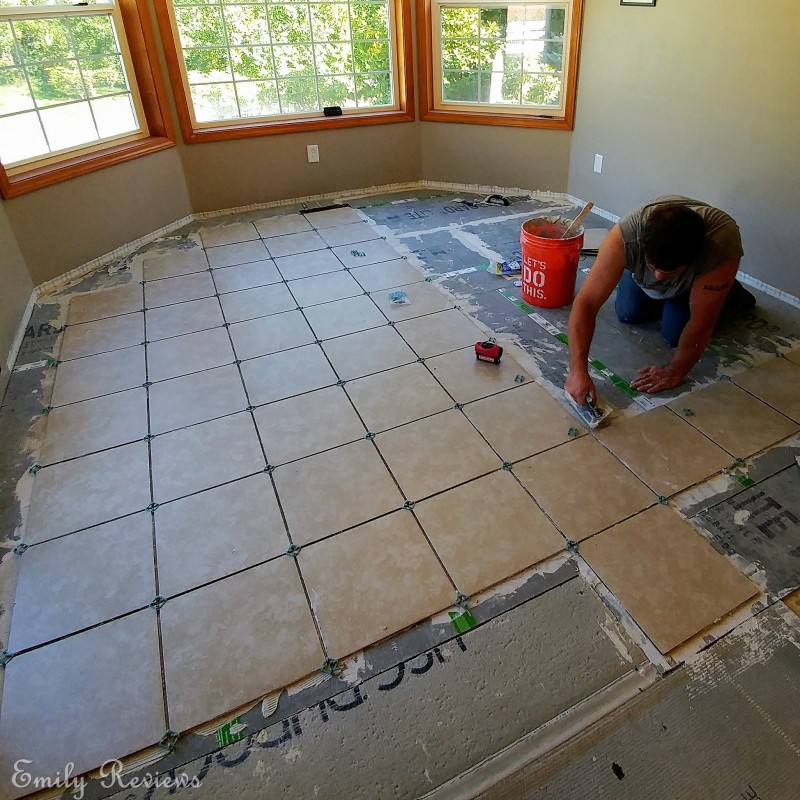
- Lay the tile on the thinset. Gently press down on the tile with your fingers widespread. This will help set the tile in place and release trapped air. As you work, use tile spacers to ensure even joint lines. Use a snap cutter or wet saw to make cuts when needed. Continue working your way through the room in 2×3 foot sections. After completing a few sections, check for squareness and levelness. Work from the center of the room out and from the wall furthest from the door towards the doorway.
- After your tiles have set overnight, use a margin trowel to scrape off excess thinset. Then mix up a batch of tile joint grout. Just like the thinset mortar, make sure you follow the grout package instructions exactly. Using a rubber float, scoop up mortar and push it into the tile joints while holding the rubber float at a 45-degree angle to the floor. Work in the same pattern as you did when laying the tile…work from the center of the room out and from the wall furthest from the door towards the doorway.
- After the grout has set (per the time instructed on the package,) wipe away grout haze with a well-wrung damp sponge. Continue wiping until the grout haze has been cleaned. Don’t get carried away with this, you don’t want to remove any of the grout in the tile joint lines.
- If your grout didn’t have a mixed in sealer, you will want to make sure you purchase one. Follow the package instructions exactly for best results.

That’s it! See, there wasn’t anything to be afraid of! Enjoy your new tile floor and be proud of your accomplishment.

Related Posts:


Hello, my name is Laurie. My family and I live near the Oregon coast. When we aren’t at work, in school, or on the volleyball court, we enjoy traveling, cheering for our favorite sports teams, playing outdoors, and checking off items on our bucket list. We are lucky in that both sets of our parents, as well as our siblings and their families, live within an hour of us. We get together often to help one another out, celebrate milestones, and go on adventures together.
This post currently has 9 responses.
-
Peggy Nunn
Wow, you have way more guts than we have. I would never attempt tile. We remodel many other things but never tile. Your kitchen looks great now.
-
Rosie
It did come out really nice, and it sounds like you did the research and took the time to do it right. I would be really nervous to do this myself, but perhaps if more savvy about DIY home reno projects, it wouldn’t seem so bad. It is expensive to even buy the material, but you must have saved a bundle. I know people who started, and gave up in the middle, then had to hire someone to fix what they did and start over! They should have had this post!!
-
Lauryn R
What a beautiful finished product! Thank you so much for sharing the step by step, I would definitely love to redo our kitchen floors as well someday.
-
ellen beck
Goodness thats a beautiful kitchen! Hubby has laid tile, although we dont have any in our own home. I would like tile perhaps in the kitchen and bathroom. If I did it the spacers and the grout would scare me a bit, but as you said work out and you have it licked. It looks terrific.
-
Cynthia R
I’m so impressed. I’ve always been too much of a chicken to try my own DIY renovation. I think the thing I’m most scared of is not laying the tiles right.
-
MeMe R
Hoping to buy our 1st home next year, so we are collecting any and all tips. This was a great article. Thanks for the read.
-
Kate V
These tips are pretty spot on. Hubs has done our bath and kitchen tile as well as front door entry way. I love how yours turned out. My tip is to buy a little extra tile for miss cuts if you are a new diy’er in the tile area and knee pads come in handy for larger rooms.
-
Stephen Reddington
I wish that I learned how to re-tile my floors years ago. I was always sure that I would have them look awful!

It is so nice to get a new floor. I usually hire someone for this, but it is terrific to read about the process of laying new tiles.